
In the age of mirrorless marvels and smartphone cameras that can shoot in 4K, it’s tempting to think great photography is about owning the latest gadget.
But the truth is simple: a $500 camera in skilled hands will outperform a $5,000 camera in untrained ones.
Your vision, technique, and ability to work with light will always matter more than megapixels.
Whether you’re shooting on a DSLR, mirrorless, compact, or even your phone, the core principles of photography stay the same.
Master them, and you can create stunning images with almost anything.
This post contains affiliate links, meaning if you click through and make a purchase I may make a small commission. I only share information about things I know, love and trust!
1. Exposure: It's All About The Light
What it is:
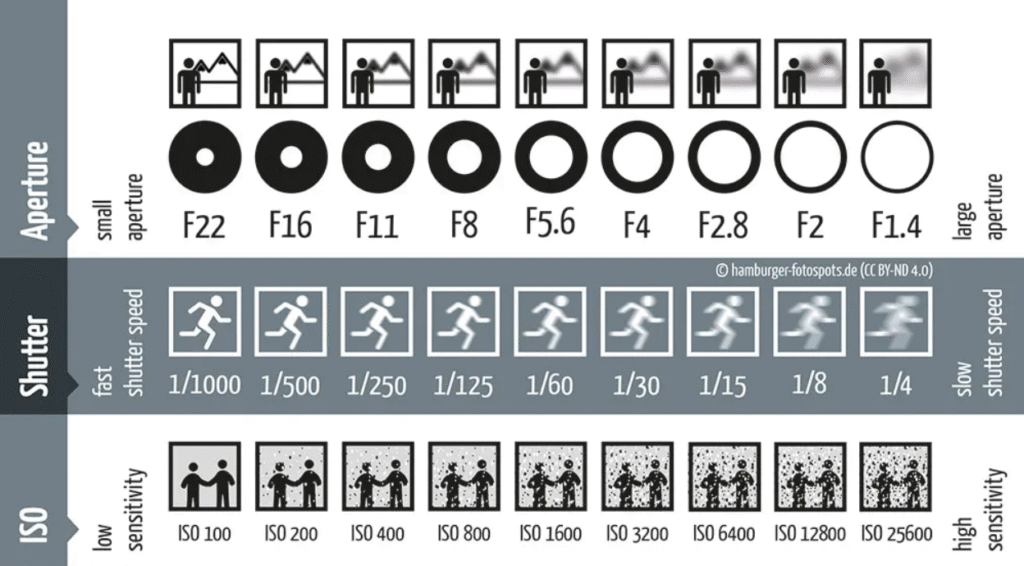
Exposure is how bright or dark your photo is. It’s controlled by the exposure triangle: aperture, shutter speed, and ISO.
Understanding these three settings will help you take control of your images instead of relying on “Auto” mode.
Aperture (f-stop)
- Controls: How much light enters through the lens and how much of your photo is in focus.
- Lower f-number (f/1.8, f/2.8): More light, blurry background (great for portraits).
- Higher f-number (f/8, f/11): Less light, more of the scene in focus (great for landscapes).
- Tip: For blurry backgrounds, use a lower f-stop and get closer to your subject.
Shutter Speed
- Controls: How long the camera’s sensor (or film) is exposed to light.
- Fast (1/500s, 1/1000s): Freezes motion (sports, wildlife).
- Slow (1/30s, 1/4s): Captures motion blur (waterfalls, light trails).
- Tip: Use a tripod for slow shutter speeds to avoid camera shake, or 2x your focal length if handheld.
ISO
- Controls: The sensor’s sensitivity to light. This cannot be changed with film.
- Low ISO (100–200): Less grain/noise, best in bright light.
- High ISO (1600+): Brighter image in low light but more grain.
- Tip: Keep ISO as low as possible for clean images, but don’t fear raising it when light is scarce.
Best Practice:
Shoot in manual mode or aperture priority to control depth of field, and watch your camera’s exposure meter.
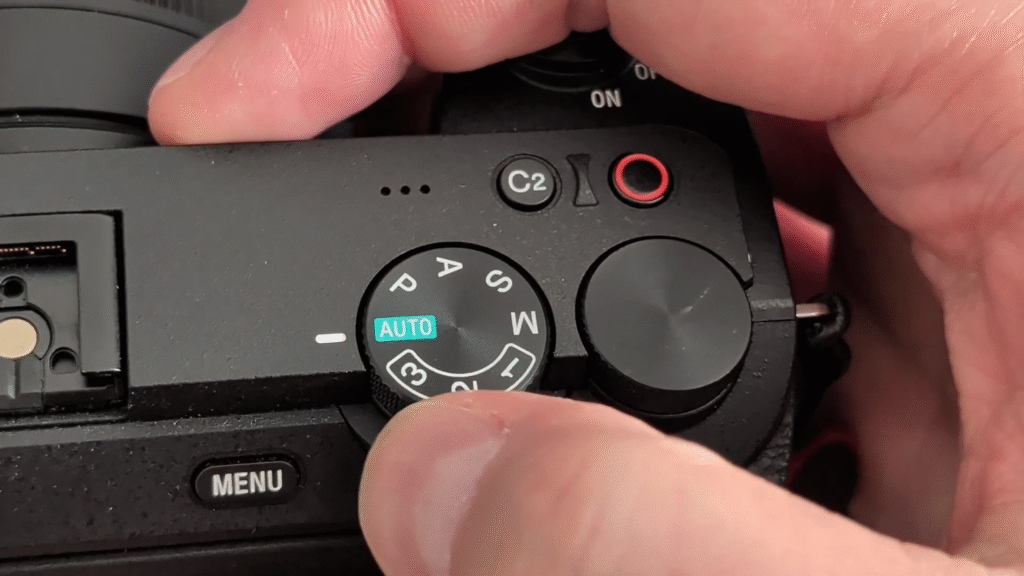
I typically shoot in aperture priority with auto ISO for stills, and shutter priority for video to maintain 180 degree shutter angle. 2x the frame rate for smooth motion blur.
Over time, you’ll predict the right settings without thinking.
You can use the sunny 16 rule if shooting film without a meter.
Set your shutter speed to the same as your film’s ISO number then set your aperture to 16.
I shoot 2 stops wider aperture to make sure I don't under expose.
2. Lighting: The Secret Ingredient to Great Shots

Why it matters:
Lighting can make or break your photo.
A perfectly composed shot in bad light will look flat, but even a simple subject can look dramatic in beautiful light.
Types of Natural Light
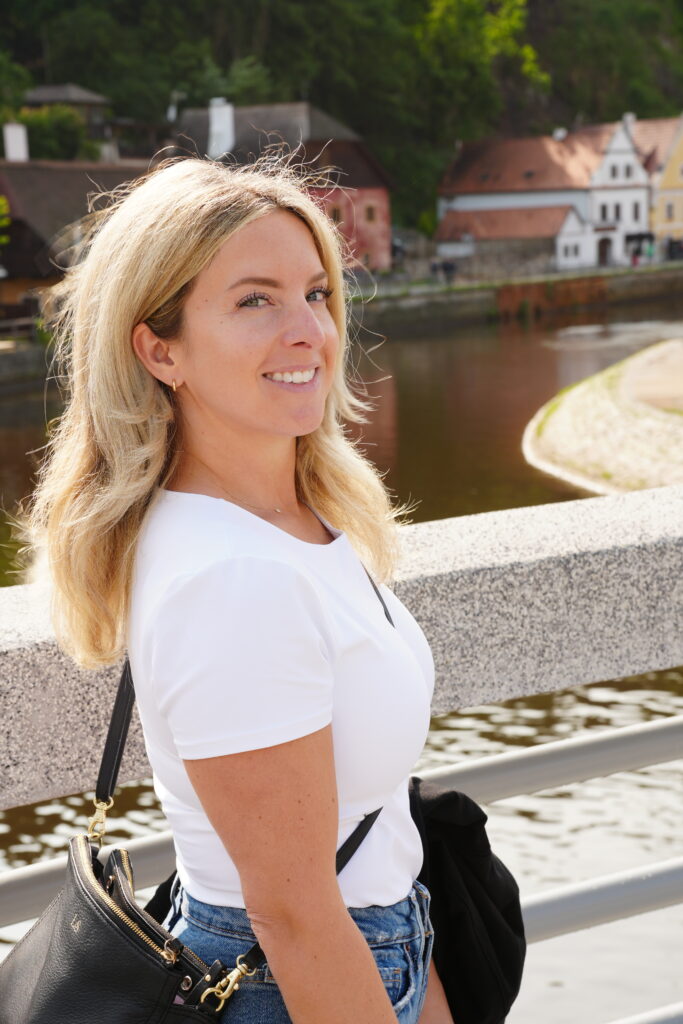
- Golden Hour: The hour after sunrise and before sunset. Soft, warm, flattering light.
- Blue Hour: The short window before sunrise and after sunset. Cool, moody tones.
- Midday Sun: Harsh and direct; use shadows creatively or find shade for softer light.
Using Shadows
Shadows add depth, texture, and mood.
Move around your subject to see how the light changes the look.

Diffusing Harsh Light
If the light is too strong:
- Find open shade (under trees, near buildings).
- Use a diffuser or even a white bedsheet to soften sunlight.
- Turn your subject so light falls at an angle or behind, instead of directly on them.
Artificial Lighting
- Flash: Best as fill light, not the main light source. Bounce it off ceilings or walls for softer results.
- LED Panels or Lamps: Great for controlled indoor lighting. Even the flashlight on your phone can make a great key light.
- Tip: Light from the side or at a 45° angle for depth. Straight-on lighting often looks flat.
Best Practice:
Always look for light before lifting your camera. Notice how it shapes your subject’s features and textures.
Don’t be afraid to backlight your subject in harsh light.
Since you’re exposing for their face, the sun can create a beautiful rim of light around their hair and face.
3. Composition: Telling a Story in a Frame

Why it matters:
Composition is how you arrange elements in your frame. It guides the viewer’s eye and conveys emotion.
The Rule of Thirds
Divide your frame into 9 equal parts using imaginary lines like a tic-tac-toe board.
Place your subject along these lines or at intersections for balance and interest.
Leading Lines
Roads, rivers, fences – any lines that draw the eye toward your subject add depth and direction.
Framing
Use natural frames like windows, doorways, or tree branches to focus attention on your subject.

Negative Space
Leave empty space around your subject to create simplicity and focus. Works especially well for minimalist shots.
Point of View
- Eye-level: Neutral and relatable.
- Low angle: Makes subjects look larger and more powerful.
- High angle: Creates a sense of vulnerability or overview.
Simplify the Scene
Cluttered backgrounds distract from your subject. Move around or adjust your depth of field to clean up the composition.
Best Practice:
Before pressing the shutter, scan the frame and remove anything that doesn’t add to the story.
Don’t be afraid to shoot wider and crop in later.
You can’t go wider once you have taken the shot.
Why Gear Matters Less Than You Think
High-end cameras give you technical advantages like faster autofocus, better low-light performance, and sharper lenses.
But, they can’t compose a shot, find good light, or choose a compelling subject.
Those are skills you can develop with any camera.
Even your smartphone has manual controls and can teach you exposure, lighting, and composition.

Once you’ve mastered the fundamentals, upgrading your gear will amplify your skills rather than compensate for their absence.
Unlike digital cameras, the body of a SLR film camera only lets a certain amount of light in.
That’s it.
The lens attached to it, and the film in the back do all the work.
Practical Exercises to Build Skill
- One Lens Challenge: Use a single focal length (like 35mm) for a week to train your eye for composition.
- Light Study: Photograph the same subject at different times of day and compare how lighting changes mood.
- Manual Mode Day: Spend an entire day shooting only in manual mode to learn how aperture, shutter speed, and ISO interact.
- Composition Walk: Take a walk and look for leading lines, frames, and interesting perspectives—shoot at least 10 examples.

Final Thoughts
Great photography is less about the price tag on your camera and more about the decisions you make before pressing the shutter.
Learn to master exposure, work with lighting, and refine your composition, and you’ll be amazed at how quickly your images improve (no matter what’s in your hands).
Remember: Your eyes are what see the shot. Your camera just captures it.